


Templates
Tools
Learn
Company
Home
Blog
Vintage
Create a Retro Vintage Postcard
Create a Retro Vintage Postcard
Looking to add a touch of retro vintage style to your graphic design work? Then you'll love this postcard tutorial! Using Kittls tools and assets, you can create gorgeous postcards that are perfect for any occasion in just a few minutes. And the best part is, the entire process is incredibly easy and fun. So, open up Kittl and let's get started!
If you haven't used Kittl before, click below to sign-up up for free.
1. Create a new blank project in Kittl
In Kittl, you can create artboards of various sizes. To change your artboard size, simply click the settings icon and choose your desired size. We are going with postcard size here.

Create a blank project and set the artboard size to postcard
2. Create the landscape
Now that you have your artboard set up, it's time to start creating your landscape. The first step is to add two basic squares to represent the bay and the horizon. To do this, open the elements panel and select the square shape on your artboard.

3. Create the scenery with illustrations
Once you have your two squares in place, you can start to add details to create your scenery. For the bay, you might want to add some water some land and a lighthouse. For the horizon, you might want to add some clouds or a sun. Just have fun and be creative!
To change the color of the illustrations, all you need to do is go to the object panel and select the illustration you want to modify. Then, simply use the color picker to choose a new color.
Once you have everything the way you want it, it's time to group the elements together. You can do this by right clicking or pressing command + g on your keyboard. This will allow you to move or resize the entire group as one unit. It's a handy trick to know when you're working with complex designs.

4. Add the main text
Add a new headline element from the text panel on the left menu. We are using the font "Anton" - it's a clean, sans-serif font that is highly legible, even at smaller sizes. Plus, its unique letterforms add a touch of personality to your artboard.
When you want to add some excitement to your text, the rise effect is a great option. To use it, simply select the text object and then choose the rise effect from the list of options. The rise effect will cause your text to appear to "jump" off the page, adding a bit of visual interest. You can control how much the text rises by adjusting the settings, so you can create a subtle effect or a more dramatic one. Just experiment until you find the perfect setting for your project. And if you ever change your mind, you can always go back and adjust the settings or even remove the effect entirely.
You can also add a text element by using the shortcut "t".

5. Add text effects and decorations
Choose the "Effects" panel and add a 3D block shadow. Change angle and offset to your liking. Finally, go down to the decoration panel and add the fading color cut effect. Adjust color, weight and distance to your liking.
When it comes to creating an eye-catching design, there's no need to stick to the basics. With a little creativity, you can easily add interest and dimension to your work. Try using the "Effects" panel to add a 3D block shadow. By changing the angle and offset, you can create a variety of different looks. Then, go down to the "Decoration" panel and add the fading color cut effect. Adjusting the color, weight and distance will help you create a unique and beautiful design.

6. Add a playful text elements
Adding a handwritten fonts can really spruce up a design. We recommend "Yellowtail" for its playful vibe. Once you've chosen your font, apply the wave transformation and use the anchor points to warp the text to your liking. For an extra touch of personality, try underlining your text with a new text element that features just a dash. Using the distort transformation will give your underlining a fun, wavy look.

7. Variable Fonts
Let's add another text element by duplicating our main text element, then changing it to bay. We've changed the font to HT Modern Hand Sans, which is a variable font. This allows us to change the width and boldness of the font.
We've also removed the 3d block shadow, added a simple block shadow and took off the fading color-cut decoration as well.

8. Adding more illustrations
We are adding more illustrations to the design - a jetski and water splashes. You can change all colors of the illustration in the object settings.

You can place illustrations behind the text by right clicking on an object and choosing backward. Alternatively, you can move the illustrations in the layers panel on the bottom right of the Kittl editor.
9. Add textures to your design
If you're looking to add some texture to your designs, you can't go wrong with a paper texture. Paper textures are perfect for giving your designs a rustic, handmade feel. And the best part is, they're easy to create! To apply a paper texture in Kittl, simply open the Texture panel on the left hand side and select a paper texture. We like to use a paper texture with an opacity of about 70%.
Once you have your paper texture selected, lock the first texture in the layers panel and then add another texture. For our design, we chose a grain texture and switched the blending mode to overlay. We then played with the opacity until we got the desired effect. 20% opacity was perfect for our design.

10. How to add a border to your design (optional)
A border can really set off your design and make it pop. It's easy to do, just follow these simple steps. First, add a basic square shape to your artboard. Resize it to the size of your artboard and then remove the object color. Next, add a border. Change the border weight and color to your liking. That's it! Now you have a beautiful border around your design.

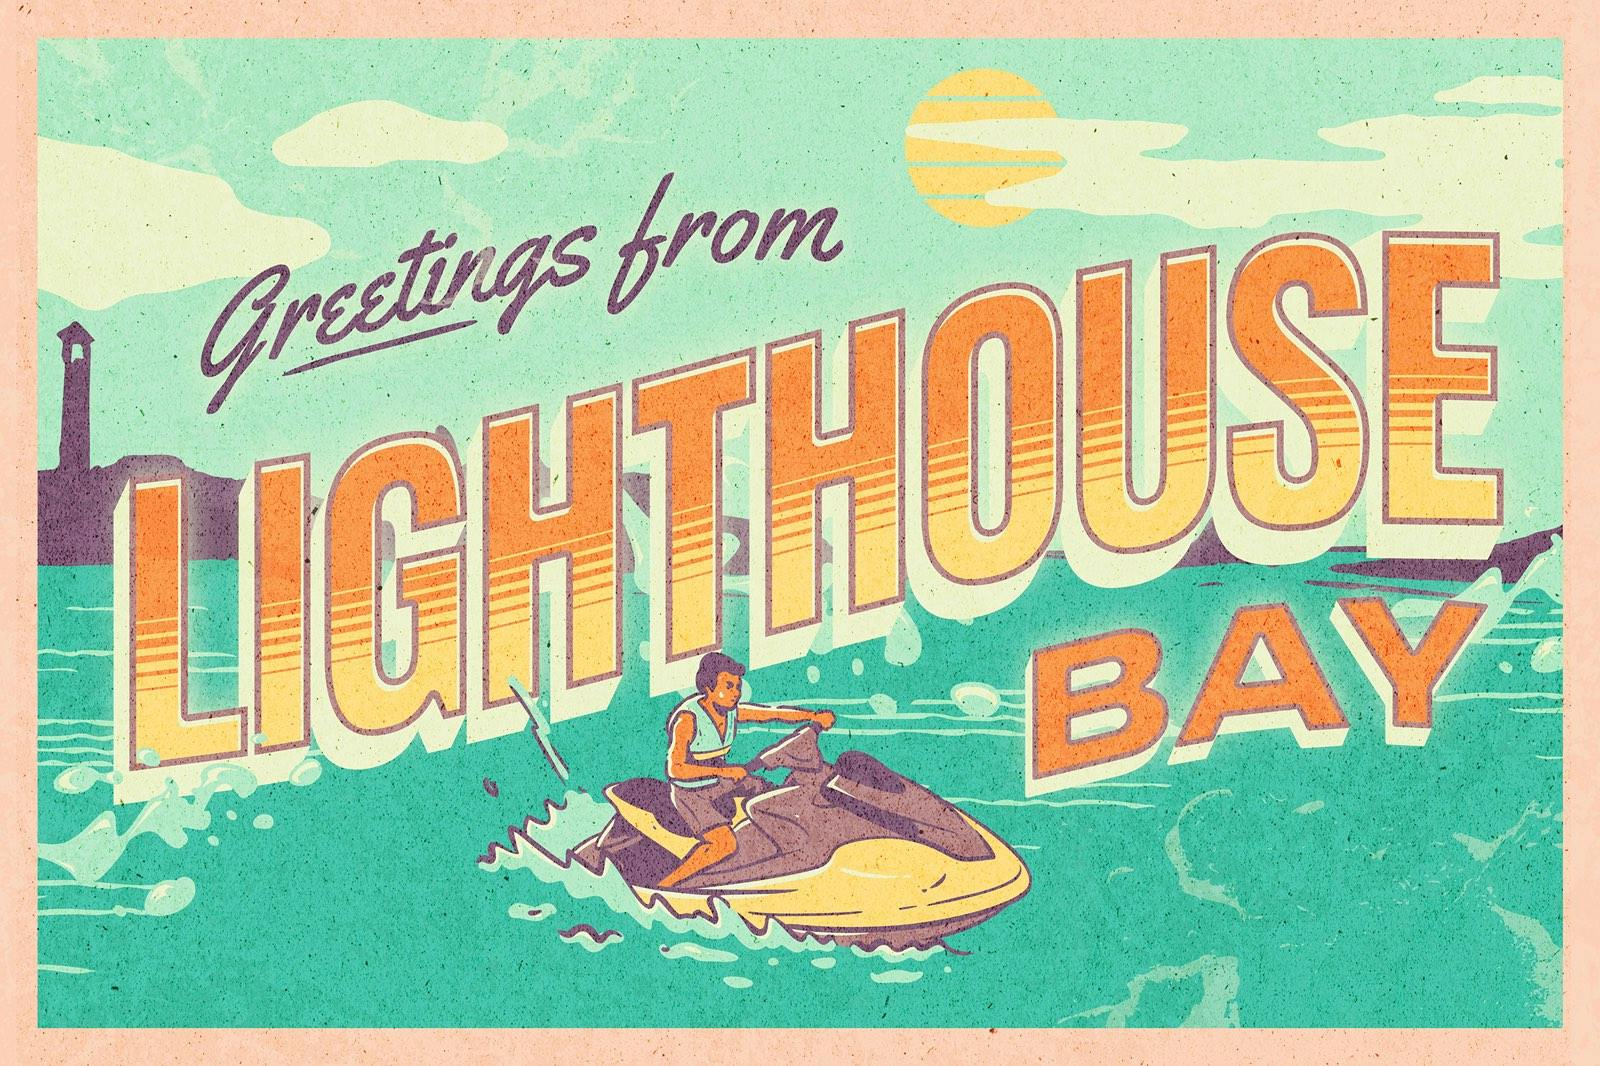
11. The finished postcard design
If you're ever stuck on any steps, check out the video linked above or open up the template of the finished design and see how it was achieved. You can also customize it your liking and create new designs with it. And who knows, you might just come up with something even better than the original!
13. Exporting the design
There are a lot of different export options in Kittl, and it can be tough to know which one is right for you. But don't worry, we're here to help! Our export guide will walk you through all the different options and help you choose the best one for your needs.

Related articles

Design
Create Movie Title Designs Like Netflix & Warner
Ever noticed those super cool movie title designs on Netflix? You might be wondering, how would I cr...

Vintage
How to design vintage car logos with little to no experience
Vintage may mean ‘old,’ but it’s not going out of fashion. Take electric cars, the supposed future o...
Vintage
Create a Vintage Badge Logo
In this vintage badge logo tutorial, Drew shows you the creative process step-by-step using Kittl. T...