Learning how to create Etsy listing images looks easy… Until you are staring at a blank canvas, a pile of product photos, and a listing that still does not look good enough to sell.
On Etsy, shoppers make split-second decisions, and your images do a lot of the heavy lifting. In fact, Etsy shares that 90% of shoppers said photo quality was “extremely important” or “very important” to their purchase decision. Before anyone reads your title or description, they are already judging how trustworthy and desirable your product feels.
That puts a lot of pressure on sellers, especially when every listing needs multiple images to stand out. For sellers without design experience, photography skills, or a big content budget, this can become a major bottleneck.
With smart templates, realistic mockups, and AI tools, you can create professional listing assets much faster. Your images can look polished and cohesive. And you can do it without advanced design skills or a full photoshoot every time.
What makes an Etsy image convert?

ETSY SHIRT: Product on Surface. Use this template

ETSY LISTING: Digital Print.
Use this template

ETSY MUG: Camera Movement Variation. Use this template
Etsy images convert when they answer questions before shoppers ever read the description. That matters because 56% of users start by exploring product images as soon as they land on a product page.
- Start with a thumbnail that is easy to read. A shopper should understand the product in a split second. Keep the focal point clear. Use enough negative space so the image does not feel crowded.
- Then, let the full image set fill in the gaps. Show what the product is, what is included, the size, the options, and what it looks like in real life. Strong product photos help shoppers know what they are buying and make more confident purchase decisions.
- Keep the image set visually consistent. Use a similar style, layout, and brand look from one image to the next. A cohesive listing feels more polished, which makes the shop easier to trust.
So remember: The thumbnail wins attention. The rest of the images reduce doubt. When buyers can understand the product quickly, they are more likely to keep going.
How to create Etsy listing images at scale with Kittl
The next step is putting “what makes an Etsy image convert” into practice. When you are creating a listing image from scratch, a few smart choices early on can make the final result much stronger. For example, let’s pretend to re-create the logic behind the iconic Etsy listing images from Kittl.
Step 1: Start with a canvas or template

Set your canvas to 3000 x 2250 px. This gives you a 4:3 layout for the first image and enough room to crop later. Keep the product centered so it still looks right in thumbnails. If you want a faster start, use our latest Etsy-listing template. If you already know your layout, start with a blank canvas.
Step 2: Upload your main product asset

Bring in the main thing you are selling. That could be a product photo, design file, logo, or preview of a digital download. This will be the base for the rest of your listing images.
Step 3: Clean up the asset

Remove anything distracting. Fix rough edges. Fill small gaps. This is where Erase & Fill helps. Use it when the image is almost right, but needs cleanup.
Step 4: Create what is missing

If the layout still feels empty, add the parts that help it feel complete. That could be a background texture, a simple pattern, an icon, a frame, or an illustration. This is a good step for using ready-made design assets instead of building everything from scratch.1
Step 5: Style the layout once

Pick one color palette. Use one or two fonts. Keep the text short. Leave space around the product so the image stays easy to read. Save those choices in Brand Styles. It lets you save and reuse colors, text settings, shadows, and photo filters inside the Brand Kit area.
Step 6: Turn it into a mockup if needed

If you sell shirts, mugs, candles, posters, or other merch, use a mockup instead of staging a full photoshoot. Place your design into a real-world scene and use that for your hero image or lifestyle image.
Step 7: Duplicate the artboard and build the full set

Do not start over for every image. Keep every image for the same listing in one project so you can see the full set at a glance. This makes it easier to stay consistent, spot gaps, and turn one strong layout into a complete listing image set.
Step 8: Export for Etsy

For images, export in JPG or PNG. Use sRGB. Keep each file under 1 MB when possible for smoother uploads. Avoid animated GIFs. Avoid transparent PNGs, since transparent areas may not display the way you expect.
Using AI images on Etsy the right way
Are you allowed to use AI images on Etsy? Yes. Etsy allows seller-prompted AI creations when they come from your own original prompts. Etsy also requires sellers to disclose AI use in the listing description.
If you are using AI images on Etsy, follow these three basic rules. Tell buyers when AI was used. Make sure the images match what they will receive. And only use visuals you have the right to use.
A few smart ways to use AI:
- Create visuals you do not already have. Step 4 is great for fast, ready-made assets like textures, patterns, icons, or illustrations. But if you want something more custom or more unique to your brand, AI can help you create a background, scene, or design element that does not look pulled from the same place as everyone else.
- Use AI when you need more variations fast. This is especially helpful when you want to test different backgrounds, moods, or lifestyle scenes without building each one from scratch.
- Add a short video when motion adds context. This can help show scale, texture, or how the product looks in a real setting. You can prompt the scene first, then turn it into a short video, which saves you from setting up the mockup by hand.
The 20-image listing strategy: What to include
Now that you know how to create your Etsy listing images, the next question is what to include. Etsy allows up to 20 images, but that does not mean you should fill every slot.
For most listings, 8 to 10 purposeful images work better than 20 repetitive ones. Each image should answer a different buyer question and move the shopper closer to a purchase.
1. Hero image

This is the thumbnail. It needs to be clear, centered, and easy to understand in a crowded search grid. If your photo needs more clarity, upscaling the image can help sharpen the result before you use it in your hero image.
2. Lifestyle image

Show the product in a real setting. For digital products, that could be a template shown on a laptop, tablet, or phone screen. For physical products, it could be a mug on a desk, a print on a wall, or a shirt on a person.
To create lifestyle-style visuals faster, use mockup tools to place your product into realistic scenes without needing to stage and shoot each one yourself.
3. Close-up image

Zoom in on the details. For digital products, show design quality, layout, or editable areas. For physical products, show texture, print quality, material, or finish. This is where you prove the product looks good up close. If your product includes artwork, logos, or line-based designs, vector tools can help keep those details crisp and clean.
4. Size guide

Use a simple visual to show scale. For digital products, this could be file dimensions, canvas size, or print size. For physical products, show exact measurements so buyers understand how big or small the item is.
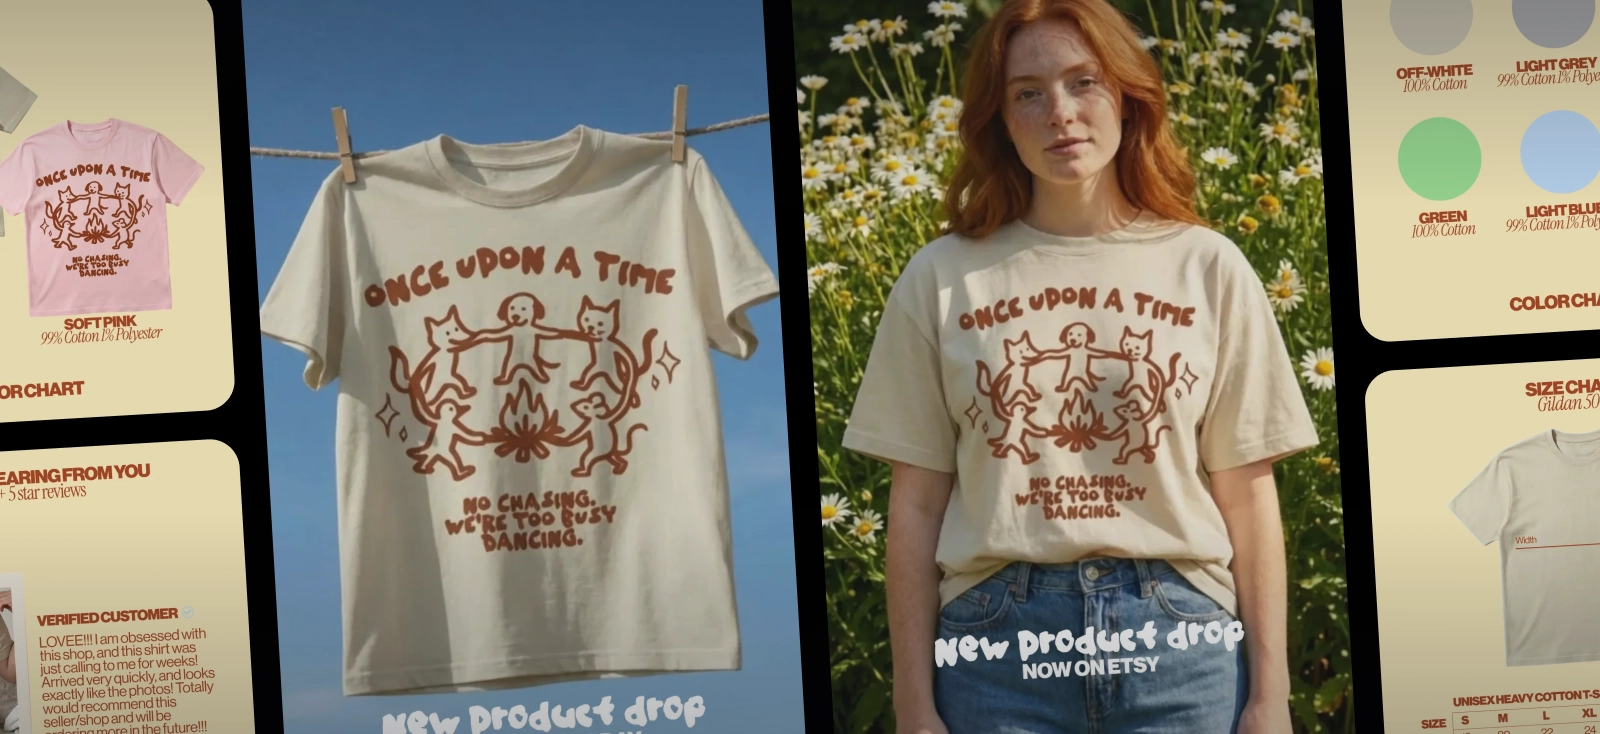
5. Variations image

Show color options, style options, or customization choices. Make them easy to compare in one place. Templates keep the layout consistent, so each option looks clean and easy to scan. They also save time, since you can swap colors, text, or product details without rebuilding the whole image.
6. What’s included image

Show exactly what the buyer will get. For digital products, this could be the file types, number of pages, templates, or formats included.
For physical products, this could be the item itself, accessories, bundle pieces, or packaging contents. This image is especially important for bundles, personalized items, and digital downloads.
7. Packaging or unboxing image

Show how the order arrives. This is most useful for physical products because it builds trust and sets expectations around presentation, gifting, and shipping care. It is not usually needed for digital downloads.
8. How-to-use image

Show the buyer what happens next. For digital products, this is essential. Explain how the file is delivered, opened, edited, or printed.
For physical products, use this only if setup, care, or assembly needs a quick explanation. A simple step-by-step visual can remove confusion fast.
9. Review or trust image

Highlight one strong review or a clear trust signal. Keep it simple. The goal is to reassure the buyer, not overload the image with text.
10. Cross-sell image

Show matching items or related products from your shop. Relevant cross-sells can help increase average order value. Pick items that make sense with the main product. Matching sets, add-ons, and coordinating designs work best.
Final tips to help more shoppers click
Once your images are ready, it helps to make small changes from time to time. These updates can help your listing make a stronger first impression.
- Try a new first image now and then. A different crop, background, or product angle can change how often people click.
- The full image set should do the rest of the selling. It should show what the product is, what is included, the size, the options, and what it looks like in real life. This reduces doubt and helps buyers understand the product faster.
- Remember: Make sure each image has one clear job. One image can show the size. Another can show what is included. Another can show how the product looks in real life. When each image focuses on one thing, the listing feels easier to scan.
Creating Etsy listing images that turn views into sales
Better Etsy images are not about doing more. They are about making it easier for shoppers to understand, trust, and want the product fast. When your visuals answer questions before the description has to, your listing does more of the selling for you.
So instead of bouncing between blank canvases, rushed photos, scattered templates, and too many tools, use Kittl to keep the whole process in one place.
Less mess. Less manual work. More scroll-stopping images that actually help you sell.