If you’re trying to make your designs look more polished without building everything from scratch, learning how to create a clipping mask in Kittl can help you get there much faster.
If you’ve only used basic cropping before, a custom shape clipping mask gives you much more control over the final composition. It’s a simple technique that can make posters, merch, brand graphics, and social visuals feel more custom and eye-catching with just a few thoughtful design moves.
In our guide, you’ll learn how to use Kittl’s custom shape tools to create standout effects, speed up your workflow, and turn basic layouts into designs that feel more intentional.
What is a clipping mask?
A clipping mask is a design technique where one object acts as the visible shape, and any image, texture, or artwork placed inside it only shows within that shape’s boundaries. Instead of displaying the full content, the mask controls what parts stay visible, making it easy to create creative layouts.
Why do designers use clipping masks?
Designers use clipping masks because they make it easier to create visuals that feel custom and visually engaging without adding a complicated workflow.
1. Textured text

Clipping masks are a simple way to create more expressive text effects by filling lettering with textures, photos, or patterns instead of a flat color. For example, a vintage poster title can feel much richer when a worn paper texture or floral image is clipped inside the text, giving the typography more depth and personality.
2. Bold photo crops

Instead of placing a photo inside a basic rectangle, you can use a custom shape as the mask container to create a more striking crop. A portrait placed inside a circle, badge, or hand-drawn shape can create a stronger focal point and give a poster or social graphic a more dynamic composition.
3. Custom frames

A vector shape can also be used to create shape-based framing for product photos, artwork, or illustrations. For example, placing an image inside an organic shape or uploaded SVG frame can make a brand asset feel more styled and intentional than a standard image box.
4. Original-looking layouts

Clipping masks help you move beyond standard image placement and build more original, layered visuals that feel less template-driven. Using custom shapes from the Pen tool or an uploaded SVG can add more personality to poster-style layouts, merch graphics, and brand visuals where a custom look matters.
5. Faster design polish without advanced software

One of the biggest advantages is speed. By selecting Use as mask, you can quickly place visuals inside a shape and refine the composition without building complex effects from scratch in advanced design software.
How to create a clipping mask in Kittl in 5 steps
Creating a clipping mask in Kittl is straightforward once you know the order. For beginners, the easiest one is to build the mask container first, then add your content inside it.
1. Choose or draw a vector shape

Start with the shape you want to use as the visible boundary of the mask. In Kittl, that needs to be a single-layer vector shape, which can come from the mask preset library, an uploaded SVG, or a custom shape you draw with the Pen tool.
If your shape is made of multiple parts, flatten it first so Kittl can recognize it as one usable mask shape.
2. Right-click and select Use as mask

Once your shape is selected, right-click and choose Use as mask. You can also use the shortcut Cmd/Ctrl + Shift + M. The selected shape becomes the mask and is ready to hold your image or texture.
3. Drop in your image, texture, or illustration

Next, place your content into the custom shape clipping mask. This can be an image, a texture, or an illustration, depending on the look you want. The same workflow can create everything from textured text effects to bold photo crops and more custom-looking brand visuals.
4. Reposition and resize the content

After the content is inside the custom shape clipping mask, double-click the mask group to enter edit mode. From there, you can move, resize, rotate, or restyle the content until the crop feels right. Once something is added to the mask, normal drag-and-drop is disabled to prevent accidental edits, so double-clicking is the key step beginners often miss.
5. Refine the final composition

Once the basic custom shape clipping mask is working, refine the overall composition. Adjust the scale, framing, and focal point so the result feels intentional rather than crowded. If you want to edit the shape itself, double-click the mask path to enter vector edit mode and adjust the points and curves.
First, create the shape, then turn it into a mask, then place the content, and finally refine the crop until the composition feels clean and purposeful.
5 creative ways to use clipping masks
Clipping masks are at their best when they do more than hide part of an image. They can turn a simple layout into something with stronger hierarchy, better focal points, and a more custom feel. Here are five creative ways to use a clipping mask in Kittl that feel practical, visual, and worth trying in real projects.
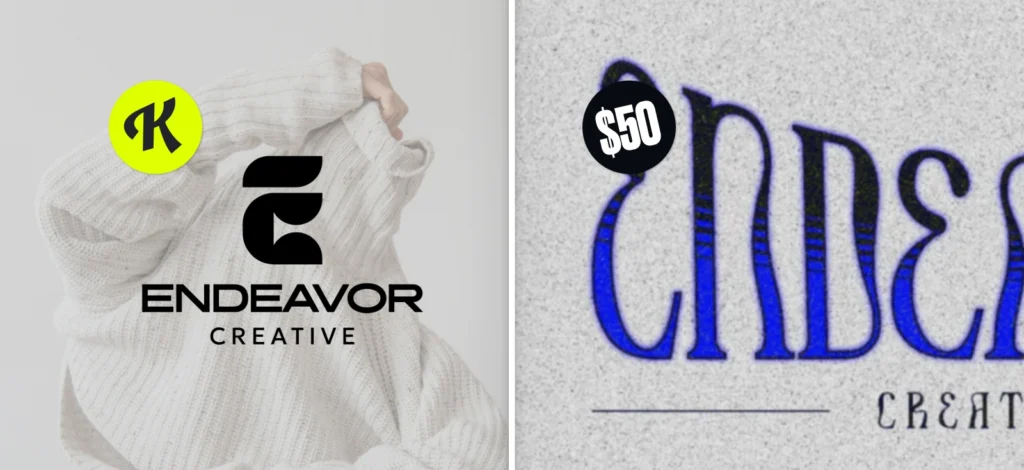
1. Image inside text

Serene Letter Mask template. Use this template

Summer Tour Travel Typography Business Promotion. Use this template
Few clipping-mask effects grab attention faster than an image inside text. because it lets the headline carry both the message and the imagery at the same time. Instead of placing a photo beside the words, you can let the image live inside the letterforms so the type becomes the focal point of the layout.
In the “Summer Tour Travel Typography Business Promotion” example, the beach photo is clipped directly into the oversized text, which helps the headline communicate the destination, mood, and theme in one move.
To create this kind of effect, use a large bold font (you can find each letter in the Illustration menu), place the image above the text, then apply a clipping mask so the photo only appears inside the letterforms.
2. Textured typography

Silence Mixtape Cover template. Use this template

Tactile Text Effects Flow template. Use this template
Textured typography works especially well when you want the type to feel embedded in the artwork instead of sitting on top of it as a separate layer. In the “SILENCE” design, the image is first clipped into the word just enough at the top of the letterforms to create a subtle bleed effect.
The same image is then repeated on a layer above in the exact same position, allowing the portrait to break past the text while still feeling connected to it. A final “SILENCE” layer with no fill and a yellow outline is placed on top to sharpen the letterforms and bring the whole composition together. For a similar layered approach, you can check out Kittl’s letter mask guide.
For a faster workflow, you can generate your own text texture with Kittl AI. Then, drop the generated result straight into your layout. That lets you skip the clipping-mask setup entirely and move straight into styling. To learn more, read: custom fonts with AI and Flows guide, where the goal is to create custom assets quickly without starting from zero.
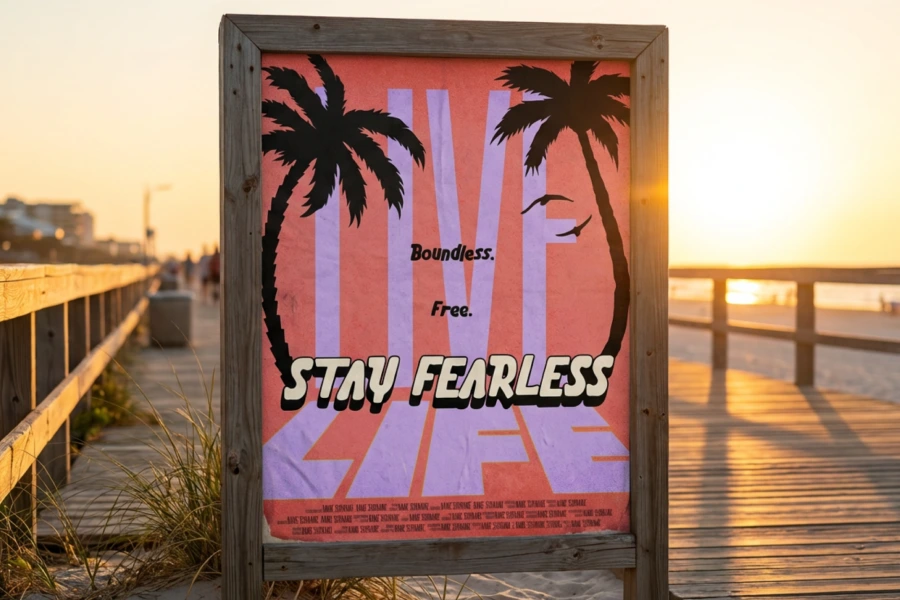
3. Custom poster crops

Typography Clothing Style Ads template.
Use this template

Living My Best Life Vision Board. Use this template
Custom poster crops work best when the crop frame becomes part of the layout structure.In the phone-frame example, the phone acts as the mask container. The main image is clipped inside the screen area to create a controlled vertical crop. The subject is then duplicated as a separate cutout layer and stacked above the frame so it can break past the top edge, which adds depth and creates a stronger focal point.
4. Framed artwork for branding

High Class Edgy Fashion Ads template. Use this template

Punk–Grunge Magazine Ad template. Use this template.
In the UNMADE STUDIO example, the large angular shape behind the main cutout works as the frame. It anchors the subject, separates it from the background, and gives the layout a repeatable structure that can scale across brand assets. The secondary cutout, stacked display type, and vertical copy all lock into that frame to create a clearer visual hierarchy and a more consistent campaign look.
Build or refine a geometric frame with Kittl’s advanced vector editing tools, place it behind the subject, then stack your typography and supporting elements around that shape so the frame controls the composition instead of the photo doing all the work.
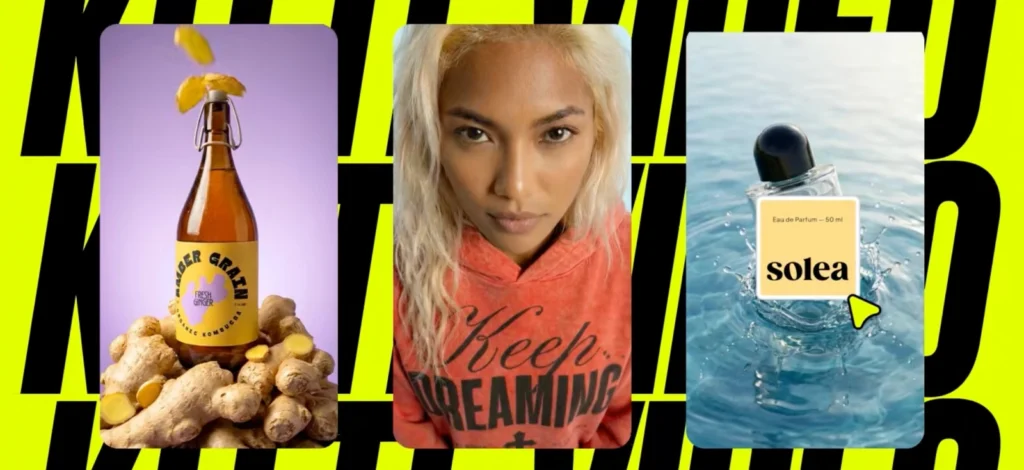
5. T-shirt and merch graphics

Flourish template. Use this template

Gratitude template. Use this template
For merch, clipping masks are a smart way to make graphics feel more layered without making them harder to produce. You can use them to build sunset-filled lettering, vintage texture inside a slogan, or a bold image treatment inside a badge or symbol.
For creators, that means a more stylized merch graphic that still reads clearly on fabric. If you want to see where this can go visually, Kittl’s typography t-shirt templates are a strong reference point for bold type, balanced composition, and wearable graphic direction.
Clipping mask vs crop vs texture clipping
When you’re learning how to use a clipping mask in Kittl, it helps to understand where it fits alongside other tools like crop and texture clipping. They can seem similar at first, but each one changes a different part of the design — whether that’s the shape, the frame, or the surface.
| Tool | What it does | Best used for | What it does not do |
| Clipping mask | Uses a single-layer vector shape as a mask to control what part of an image, texture, or illustration stays visible | Custom shapes, image inside text, shape-based framing, and more stylized custom image treatments | It is not the fastest option if you only need to trim an image into a simpler frame |
| Crop | Trims the visible edges of one image to improve framing, composition, aspect ratio, and focal point placement | Cleaning up image placement, tightening a layout, or adjusting an image to fit a format | It does not turn the image into a new shape or create masked text effects |
| Texture clipping | Applies texture across the artboard content to change the surface and overall finish of the design | Paper grain, grunge, paint, distressed effects, tactile typography treatments, and more atmospheric or vintage-looking graphics | It does not reshape the content like a clipping mask or reframe an image like a crop |
Crop changes the frame, clipping masks change the shape, and texture clipping changes the surface.
For visual reference, you can also browse Kittl templates or masked typography projects on Behance to see how these effects show up in posters, branding, and editorial layouts.
Common mistakes and how to fix them
Most beginner issues with clipping masks in Kittl come down to shape setup, layer order, or editing the wrong part of the mask. Let’s review them one by one.
- The mask shape is not a single-layer vector
If your mask is not working at all, this is usually the reason. Kittl only allows a single-layer vector shape to become a container, so grouped artwork, multi-part illustrations, or unmerged SVG elements may not work right away. A good fix is to simplify the shape first using Kittl’s Shape Builder tool, then try Use as mask again. If you made the shape with the Pen tool, check that the path is fully closed, so it behaves like one complete vector shape. - The wrong object is selected
If Kittl clips the wrong image or the result looks backwards, the problem is usually the selection or layer order. In Kittl, the shape acting as the mask needs to sit underneath the content you want to place inside it. When you select multiple objects and apply Use as mask, Kittl uses the lower shape as the visible boundary and clips the objects above it into that container. So if the wrong thing gets masked, recheck the layers first before you do anything else. - The content is hard to position
Once content is inside the mask, editing behaves a little differently; you cannot always move it the way you normally would on the canvas. The easiest fix is to follow Kittl’s clipping mask guide and double-click into the mask group so you can reposition, resize, or rotate the content inside it. If you need to adjust the image placement more intentionally, A better way to approach it is to think in terms of framing and focal point. Kittl explains image cropping: focus on framing, composition, and where the focal point sits inside the visible area. - The effect looks busy
When a clipping mask feels messy, it is usually not because the feature is wrong. It is because too many visual elements are competing at once. A detailed texture inside a complex shape can quickly start to feel crowded. The fix is usually to simplify one part of the design: use a cleaner shape, choose a stronger image, or adjust the crop so the focal point reads more clearly. Kittl’s image cropping guidance is especially helpful here because the same principles of composition and focal-point emphasis apply to clipping masks, too.
Key takeaways on how to create a clipping mask in Kittl
Now that you’ve seen how to create a clipping mask in Kittl, the biggest takeaway is that this technique is not just a visual effect.
- A clipping mask helps you place images, textures, or illustrations inside a custom shape, so your layouts feel more intentional than standard image placement.
- In Kittl, the workflow is simple: start with a single-layer vector shape, apply Use as mask, then refine the content inside the mask container until the custom shape clipping mask composition feels right.
- Clipping masks are especially useful for image inside text, textured typography, custom poster crops, framed artwork, and merch graphics.
- Knowing the difference between clipping masks, crop, and texture clipping makes it much easier to choose the right tool for the result you want.
- Once you understand the basics, clipping masks become a reliable shortcut for creating stronger visual hierarchy, more custom image treatments, and more original-looking layouts without a complicated workflow.
Ready to try it yourself? Open Kittl and start experimenting with clipping masks, custom shapes, and layered compositions to turn simple ideas into standout designs.
Frequently asked questions about how to create a clipping mask in Kittl
-
Can I use a custom shape clipping mask in Kittl?
Yes. You can use a vector shape as a mask, including shapes you create with the Pen tool for more custom compositions.
-
Can I upload my own SVG and use it as a mask?
Yes. You can prepare your file with Kittl’s SVG converter, bring it into the editor through uploading your elements. Use it as a mask once it’s set up as a clean vector.
-
What’s the difference between a clipping mask and a letter mask?
A clipping mask gives you more flexibility because you can place images, textures, or illustrations inside a custom shape. A letter mask is more typography-focused, so it’s especially useful when you want to build image-filled words or panoramic text effects quickly.
-
Can I add textures inside a clipping mask?
Yes. You can place textures inside a clipping mask for more tactile type and image treatments, or use Kittl’s dedicated texture clipping workflow when you want to apply texture across the design more broadly.