If you’ve ever asked an AI to generate a “clean poster with bold typography” and gotten something that looks like a ransom note, you already know the problem.
For years, AI image tools have been great at making things look impressive — until you actually needed them to actually work. The moment typography, layout, or hierarchy entered the picture, everything fell apart. Letters warped, spacing drifted, and suddenly your “design” looked more accidental than intentional.
ChatGPT Image 2.0 changes that.
For the first time, an image model doesn’t just generate visuals — it starts to reason through them. Layout, structure, even content decisions feel more deliberate. It’s a noticeable shift from “here’s an image” to “here’s something that almost understands your brief.”
But here’s the part that matters if you’re actually designing:
GPT Image 2 is excellent at generating starting points.
It’s still not built to finish the job.
In this guide, we’ll break down what makes ChatGPT image 2 different, how it compares to other tools, what it costs, and how to turn those raw outputs into real, usable designs using Kittl — with prompts you can test along the way.
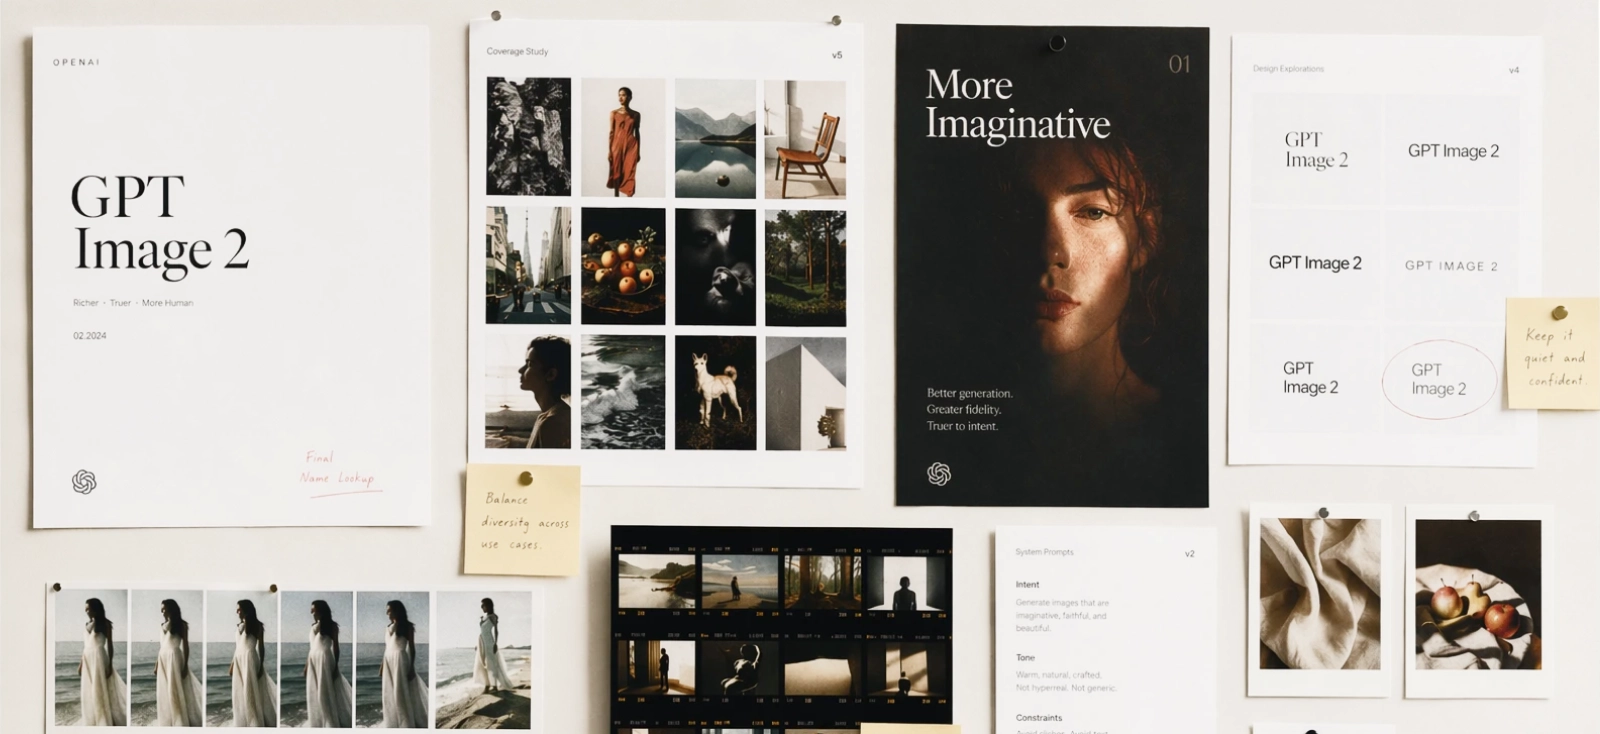
What is ChatGPT Image 2.0?

At its core, ChatGPT image 2.0 is OpenAI’s next-generation image model powered by GPT-level reasoning. That phrase gets thrown around a lot, but here it genuinely changes how the tool behaves.
Instead of simply translating text into visuals, the model breaks your prompt into components — subject, layout, hierarchy, style — and makes decisions before it renders anything.
You’re no longer just describing an image. You’re giving it something closer to a design brief, and for the first time, the model can follow that brief with surprising consistency.
This is why gpt image 2 openai is often described as a “visual thought partner.” It doesn’t just react to prompts; it interprets them, organizes them, and prioritizes what matters in the composition. As if you have your own little graphic designer partner to help you with your tasks.
The model also operates with a knowledge cutoff of December 2025, which can be extended through Thinking Mode, allowing it to ground outputs in more current information. Combined, these features push it beyond basic image generation and into something closer to visual problem-solving.
Core capabilities: what makes ChatGPT Image 2.0 different?
Flawless text rendering & multilingual support

Text has always been the breaking point for AI-generated images. Not in a subtle way, either. Posters came out unreadable, menus looked corrupted, and anything involving typography required hours of cleanup.
GPT Image 2 changes that dramatically.
You can now generate:
- Posters with clear headlines
- Menus with aligned pricing
- UI mockups with readable labels
- Logos that don’t immediately fall apart
It also supports multiple languages, including Japanese, Korean, Chinese, Bengali and Hindi, reflecting a broader shift in how models are trained to treat typography as part of the visual itself .
That said, the text is still baked into the image. It looks correct, but it isn’t truly editable — which becomes important when moving into real design work.
Try this prompt:
“Minimalist coffee shop menu, cream background, elegant serif typography, clear sections for espresso, latte, tea, and desserts, price list aligned right, balanced spacing”.

Image generated by Kittl AI Image Generator (ChatGPT Image 2.0 model)
Without even putting the details of Espresso, Latte, etc, I managed to generate a usable menu like this. Imagine what you can do with all the details!
If the text looks right but feels slightly off, trust that instinct. AI can approximate hierarchy, but it rarely nails spacing and alignment. That’s your cue to refine it in a real design tool
If you need more tips on how to prompt better, check out our article here: Writing AI prompts: Tips & tricks for creatives.
The “Thinking” mode & web grounding
One of the more interesting upgrades in chatgpt image 2.0 is its ability to ground visuals in real information through Thinking Mode. Instead of guessing, it can structure outputs based on actual data.
This changes how you prompt. Instead of asking for decoration, you can ask for structured communication.
Try this:
“Create a clean infographic about freelance income streams in 2025, include 3 key data points, modern layout, icons, white and blue palette”

Image generated by Kittl AI Image Generator (ChatGPT Image 2.0 model)
The result will feel coherent and well-structured at first glance. All you need is to tweak and add the details of what you want specifically.
You can also get other visuals like this:

Use Thinking Mode for structure, not polish. It’s excellent at organizing ideas, but still needs refinement for clarity and readability. Think of it as a strategist, not a finisher.
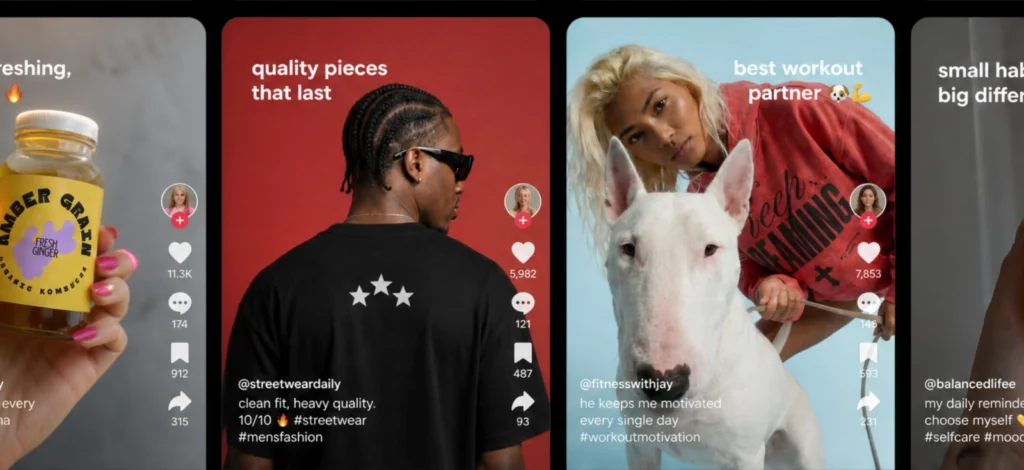
Multi-image continuity & flexible aspect ratios
GPT Image 2 can generate multiple images that actually feel like they belong together. Not just similar, but consistent in character, composition, and tone.
This makes it ideal for:
- Comic panels
- Sticker packs
- Social media carousels

It also supports a wide range of aspect ratios without breaking layout logic — something earlier tools struggled with.
Earlier image models were heavily biased toward square outputs. The moment you moved into vertical or wide formats, layouts would fall apart — elements got cramped, spacing felt off, and important details were often cut or pushed out of frame.
GPT Image 2 handles this differently. Instead of just stretching the canvas, it adjusts the composition itself, so the layout still makes sense across formats.
In practice, that means you can reliably generate formats like:
- 1:1 (square) — social posts, stickers
- 4:5 (portrait) — Instagram posts
- 9:16 (vertical) — stories, mobile ads
- 16:9 (landscape) — banners, presentations
- 3:2 / 4:3 — posters and general layouts
Try this:
“Create a 6-panel comic of a freelance designer working late at night, soft lighting, consistent character design, minimal dialogue”

Image generated by Kittl AI Image Generator (ChatGPT Image 2.0 model)
You’ll notice the panels feel intentionally connected, not randomly generated.
Stylistic realism & rough-to-polished workflows
GPT Image 2 is particularly strong at transforming rough ideas into fully realized visuals. You don’t need a polished concept to get something compelling — even a crude sketch or loosely described idea can be translated into a clear, stylistically defined output.
This is where the model starts to feel less like a generator and more like a creative interpreter. Instead of simply rendering what you describe, it understands how that idea should look within a specific visual language.
That means you can take the same concept and push it in completely different directions, depending on the style you define.
For example:
“Rough sketch of a warrior character, convert into detailed manga style, dynamic pose, inked lines, dramatic shading”

Image generated by Kittl AI Image Generator (ChatGPT Image 2.0 model)
Or:
“Simple outline of a city skyline, transform into pixel art style, night scene, neon lights, 16-bit aesthetic”

Image generated by Kittl AI Image Generator (ChatGPT Image 2.0 model)
Or even:
“Basic composition of a car on a road, cinematic style, realistic lighting, shallow depth of field, film grain”

Image generated by Kittl AI Image Generator (ChatGPT Image 2.0 model)
In each case, GPT Image 2 doesn’t just clean up the input — it reinterprets it through a specific stylistic lens. The result feels intentional, not generic.
That said, these outputs are still flattened images. They’re excellent for exploration, concept development, and visual direction, but they aren’t built for precise editing or production use. You’re getting a polished visual, not a flexible design file.
Use GPT Image 2 to explore direction, not to finalize execution. It’s best at helping you decide what works before you commit to details. That alone can save hours.
Token pricing & output strategy: standard vs. HD (and what you’re actually paying for)
On paper, pricing in ChatGPT image 2.0 is simple:
- Standard images cost around 15 tokens
- HD images cost around 30 tokens
But in practice, you’re not really paying for images. You’re paying for how quickly you get to something usable.
With tools like DALL·E 3, it was common to generate multiple variations just to land on something workable. The real cost wasn’t the price per image — it was the number of retries needed to get there.
With GPT Image 2, outputs are more structured from the start. Layouts hold together, text is readable, and compositions feel intentional. That means fewer wasted generations and more value per token.
Instead of thinking in terms of cost per image, it’s more useful to think in terms of cost per usable asset.
Token strategy breakdown
| Mode | Token Cost | Output Quality | Best For | When to Use |
| Standard Mode | ~15 tokens | Medium–High (structured, usable) | Rapid prototyping, storyboarding, wireframing | When you’re still exploring ideas |
| HD Mode | ~30 tokens | High (refined, detailed) | Print assets, high-res banners, complex UI mockups | When your direction is locked |
What makes this different from older tools is that Standard mode is actually useful. You’re not just generating rough drafts — you’re generating workable directions. Layouts make sense, text holds together, and the output is often close enough to evaluate without multiple retries.
That’s why jumping straight into HD tends to backfire. You’re paying for refinement before you’ve decided what’s worth refining.
A more effective workflow is to stay in Standard mode while exploring ideas, narrowing down composition and style, and only switch to HD once the concept is clear. This way, HD tokens are spent on outputs that are far more likely to be used — not discarded.
Kittl also has various models you can choose from like Seedream 2.0, Nano Banana, and so much more. Read more about it here: Meet the 12 brains behind Kittl’s AI Image Generator.
Think in “cost per usable design,” not cost per image. One good Standard output plus one HD final is usually cheaper than five HD guesses.
ChatGPT Image 2.0 vs. The Competition
The current AI image landscape isn’t about one tool replacing the others — it’s about understanding what each one does best. The real advantage comes from knowing when to use which tool, especially if you’re building a professional workflow.
Comparison Overview
| Tool | Strength | Weakness | Text Rendering | Prompt Accuracy | Best Use Case |
| GPT Image 2 | Structured layouts, reasoning, typography | Limited editability post- generation | Excellent | Very high | UI mockups, posters, infographics, design concepts |
| Midjourney | Artistic style, lighting, cinematic visuals | Weak text, less predictable outputs | Poor | Medium | Mood boards, concept art, visual exploration |
| Nano Banana 2 (Gemini) | Realism, lighting, object consistency | Less layout awareness, weaker typography | Strong | High | Product visuals, photorealistic scenes |
ChatGPT Image 2.0 vs. Midjourney
Midjourney is still one of the strongest tools when it comes to pure visual impact. It excels at creating images that feel cinematic, expressive, and highly stylized. If you’re working on concept art, album covers, or anything that prioritizes mood over structure, it remains incredibly effective.
Where it starts to break down is in areas that require precision. Text rendering is still unreliable, and outputs can drift away from your prompt in ways that look impressive but aren’t always useful. You often end up with something visually striking, but not something you can directly build on without reworking it.
GPT Image 2 takes a different approach. It prioritizes clarity over flair. Layouts follow logic, text holds together, and prompts are interpreted more literally. The result is less dramatic, but far more usable — especially for design work that involves hierarchy, readability, and structure.
To see that difference in practice, try a prompt like:
“Modern coffee shop poster, bold headline ‘Brew Better’, clean layout, warm tones, clear typography hierarchy, minimal design”
Even with the same prompt, usually, you’ll see the difference clearly. Midjourney leans into atmosphere and visual richness, while GPT Image 2 focuses on structure and readability.
In simple terms, Midjourney is still the better choice for exploration and aesthetics. GPT Image 2 is the better choice when you need something that behaves like a layout, not just an image.
Don’t fight Midjourney for precision. Let it explore mood, lighting, and style, then bring the result into a design tool to structure it properly.
ChatGPT Image 2.0 vs. Nano Banana 2 (Gemini)
Nano Banana 2 is particularly strong in photorealism. It handles lighting, textures, and object consistency with a level of polish that makes it ideal for product visuals, lifestyle imagery, and anything that needs to look convincingly real.
It also performs well when generating consistent subjects across multiple scenes, which makes it useful for campaigns or visual series.
Where it falls short is in layout awareness. While the images are realistic, they’re not necessarily structured. Typography is handled better than older models, but it doesn’t reach the same level of clarity and control as GPT Image 2. The result often feels like a polished image rather than a designed composition.
Using the same prompt:
“Modern coffee shop poster, bold headline ‘Brew Better’, clean layout, warm tones, clear typography hierarchy, minimal design”
GPT Image 2 output

Image generated by Kittl AI Image Generator (ChatGPT Image 2.0 model)
Nano Banana 2 output

Image generated by Kittl AI Image Generator (Nano Banana 2 model)
The difference here is less about style and more about intent. Nano Banana 2 produces something visually convincing, but GPT Image 2 produces something structurally usable.
If Nano Banana 2 is focused on realism, GPT Image 2 is focused on communication — which becomes far more important when you’re designing anything that involves layout, text, or hierarchy.
Use Nano Banana 2 when realism matters more than layout. It’s strongest when you treat it like a camera, not a design tool.
Where ChatGPT Image 2.0 ends and Kittl begins (The creator workflow)
By now, it’s clear that ChatGPT image 2.0 is incredibly good at generating visuals. It can structure layouts, render clean typography, and translate ideas into something that feels surprisingly close to a finished design.
It’s still just an image. You can’t properly edit the text, you can’t scale it cleanly, and you can’t prep it for print without reworking everything. That’s the gap.
Kittl is where that gets solved.
Instead of exporting and fixing things somewhere else, you generate the image and keep working on it in the same place — adjusting, rebuilding, and getting it ready to use.
1. Generate your base asset with ChatGPT Image 2.0 (inside Kittl)

Before anything else, you need a strong visual direction — and this is where starting inside Kittl makes a real difference. Instead of generating an image elsewhere and importing it later, you can create your base asset directly in the same space where you’ll design, refine, and export it.
Kittl’s AI Image Generator gives you access to multiple models, including ChatGPT Image 2.0, alongside others like Seedream, Nano Banana, Flux, Google Imagen, and more. That means you can experiment with different styles without leaving your workflow.
How to do it:
- Open Kittl Editor and create a new project
- Go to AI Image Generator in the left panel
- Select ChatGPT Image 2.0 (or test other models if needed)
- Enter your prompt, for example:
“Vintage motorcycle illustration, muted tones, distressed style, bold centered composition” - Choose your format (square, portrait, or landscape)
- Generate a few variations and place your favorite on the canvas
You’ll end up with something like this:

At this stage, you’re not aiming for perfection. You’re building a visual foundation — something you can refine, edit, and turn into a real design inside Kittl.
Generate 2–3 variations before choosing one. The best direction often isn’t your first result — it’s the one you refine.
2. Turn your AI image into scalable design with AI Vectorizer

At this point, you have a strong visual — but it’s still a flat image. That’s fine for inspiration, but not ideal if you want to resize it, print it, or reuse elements across different formats.
This is where Kittl’s AI Vectorizer becomes essential. It converts parts of your image into scalable vector elements, so you’re no longer locked into pixels.
How to do it:
- Select your generated image on the canvas
- Click Vectorizer (or open the AI tools panel)
- Adjust the vectorization level depending on detail
- Apply and separate elements if needed
Now your design can:
- Scale without losing quality
- Be edited more precisely
- Adapt to different formats (t-shirts, posters, packaging)
This is the moment your image starts behaving like a real design asset — not just a visual output.
Vectorize only what needs flexibility. Keep textures or complex details as raster to preserve depth and realism.
3. Rebuild typography with full control

Even though gpt image 2 is surprisingly good at rendering text, it’s still locked into the image. You can’t tweak the font, fix the spacing, or adjust hierarchy without essentially fighting the image itself.
And if you’ve ever tried to “just nudge” AI-generated text, you already know how that goes.
So instead of fixing it, you replace it.
Inside Kittl, you can layer proper typography over your generated visual — using real fonts, real spacing, and actual control. That means you can decide how the headline reads, how elements align, and how the whole thing feels as a composition, not just an image with text on top.
How to do it:
- Remove or cover the text in your generated image
- Add a new text layer in Kittl
- Choose a font that fits the style
- Adjust spacing, size, and alignment until it feels right
- You can even add in some text effects if it feels right
It’s a small shift in process, but a big shift in outcome. The moment you replace AI text with intentional typography, the design stops looking generated and starts looking designed.
If the text feels “almost right,” it’s usually not. Rebuilding it properly takes minutes and makes the entire design feel more intentional.
4. Apply textures, layout, and build on top of it

By now, the design works. The image is solid, the text reads properly, and everything is in the right place.
This step is where you stop treating the AI output as something fixed and start treating it as something you can build on.
Most of the time, the generated image gets you about 70% there. The remaining 30% is what actually makes it feel complete — and that’s usually where adding your own elements comes in.
In Kittl, that might mean:
- Pulling in icons or illustrations from the content library
- Adding simple shapes to frame or balance the layout
- Or using the pen tool to draw small details that tie everything together
You’re not replacing the image — you’re extending it.
A background element can give the design more structure. A small icon can make a message clearer. Even a simple shape behind text can make everything easier to read.
Combined with light texture and spacing adjustments, this is where the design starts feeling less like a generated visual and more like something you’d actually ship.
How to do it:
- Add a texture if the image feels too clean or flat
- Bring in elements from the content library if something feels missing
- Use shapes or simple drawings to support the layout
- Adjust spacing and alignment until everything sits comfortably
- Duplicate and test a variation if needed
You’re not overhauling anything here — just filling in the gaps the AI doesn’t know about.
If a design feels unfinished, it usually needs one extra layer — not ten. Add one element that supports the idea and stop there.
5. Mockups, export, and making it usable

Up to this point, you’ve been working on the design itself. This last step is about putting it into the world — or at least seeing how it holds up outside the editor.
Because a design can look great on a blank canvas and still fall apart the moment it’s placed on a product, a poster, or a real layout.
This is where mockups help. Instead of guessing, you can drop your design onto something tangible — a t-shirt, packaging, a poster — and immediately see what works and what doesn’t.
Sometimes nothing needs to change. More often, you’ll notice small things:
- Text that feels too small
- Spacing that looked fine but now feels off
- Colors that behave differently in context
That quick reality check is usually what separates a “good design” from something you’d actually use.
In Kittl, you can place your design into mockups directly, adjust if needed, and then export in the format that fits your use case.
How to do it:
- Place your design into a mockup (apparel, print, or product)
- Check scale, spacing, and readability in context
- Make small adjustments if something feels off
- Export in the format you need (PNG, PDF, or print-ready)
Once you’ve done that, you’re no longer working with an idea or a draft. You have something that can actually be shared, sold, or shipped.
Always check your design in a mockup before exporting. What looks fine on canvas can feel completely different in context.
3 Ways to Monetize ChatGPT Image 2.0 Using Kittl
AI image generation isn’t just a creative tool anymore — it’s a shortcut into products you can actually sell. The reason this works is simple: platforms like Etsy, Redbubble, and Gumroad don’t reward complexity. They reward volume, consistency, and niche ideas.
That’s exactly where ChatGPT image 2.0 becomes useful.
Instead of spending hours illustrating from scratch, you can generate strong visual directions in minutes — then refine them into something usable with Kittl. The combination makes it much easier to go from idea → product → listing, especially if you’re just starting out.
Here are three directions that are both realistic and scalable.
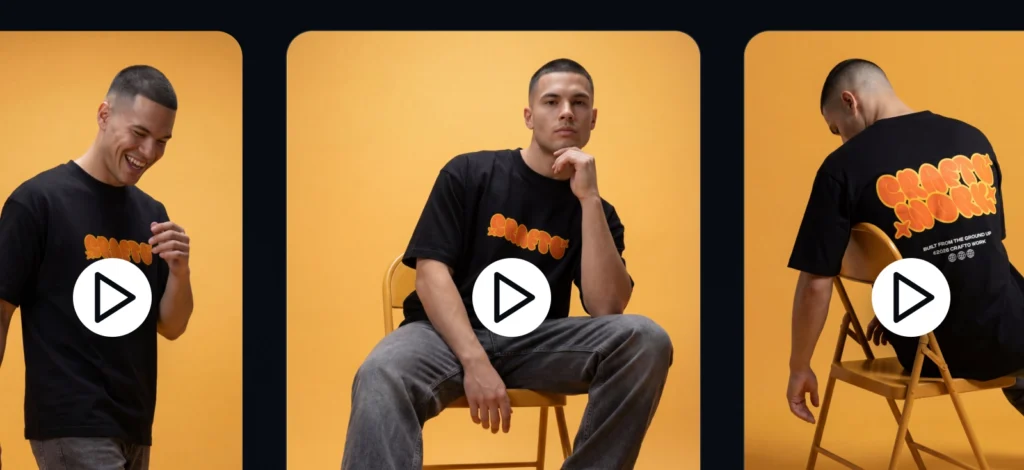
Print-on-demand apparel

If you’re new to monetizing design, print-on-demand (POD) is one of the easiest places to start. You don’t need inventory, you don’t handle shipping, and you can test ideas quickly through platforms like Etsy, Redbubble, or Printify.
The barrier to entry is low — which is exactly why design quality matters. Most listings are competing on the same formats, so what stands out is how well the design actually holds up on a product.
Start by generating a strong visual direction using GPT Image 2:
“Detailed retro sunset illustration with mountains and palm trees, 80s color palette, bold composition, vintage print texture”
From there, bring it into Kittl and prepare it for real use. This means converting key elements into vectors so the design scales cleanly across sizes, and rebuilding typography so it prints sharply instead of being locked into the image.
Once the design is solid, place it into a t-shirt or hoodie mockup directly in Kittl. Now you have both the print file and the product images needed for your listing.
This is what turns a generated visual into something you can actually upload, test, and sell.
POD isn’t about perfect designs — it’s about testing quickly. The faster you can turn one idea into multiple variations, the better your chances of finding what sells.
Marketing collateral & infographics

Not everything you make needs to be a product. A lot of designers use this workflow to speed up client work — especially for things like social posts, infographics, or quick campaign visuals.
There’s always demand for that kind of content. The problem is, it’s repetitive. Same formats, different information, over and over again.
That’s where GPT Image 2 helps.
You can start with something like:
“Create a clean infographic about freelance income streams in 2025, include 3 data points, modern layout, icons, minimal palette”
You’ll get something that looks pretty close. Sections are there, icons are there, it almost works. But “almost” doesn’t fly in client work.
So you bring it into Kittl and fix what actually matters:
- Replace the text so it’s editable
- Apply the client’s fonts and colors
- Adjust spacing so it doesn’t feel cramped or uneven
Once that’s done, you’ve got something you can send, reuse, or tweak later without rebuilding it from scratch.
That’s the real win here — not just making it faster once, but not having to redo it every time.
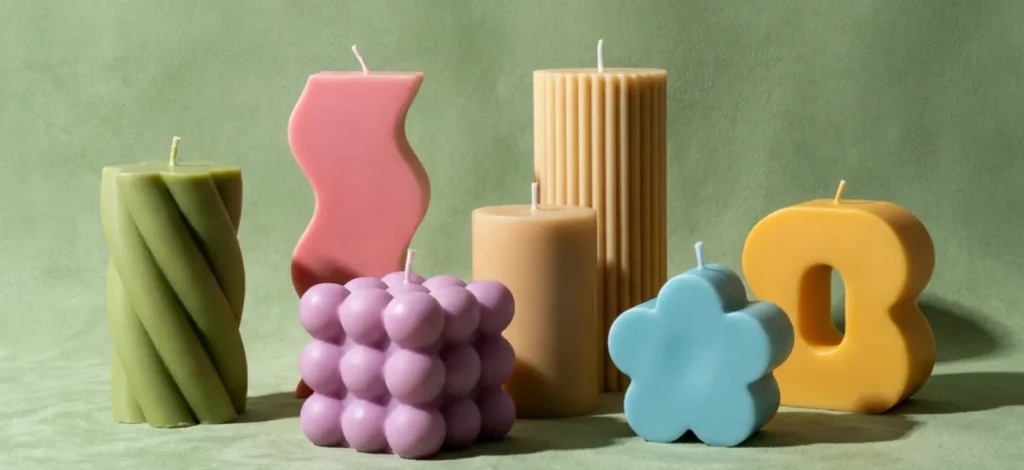
Digital stickers & asset packs

If you want something simpler to start with, digital products are a good option. No shipping, no production — just files people can download and use.
Stickers and small asset packs are everywhere right now, especially on Etsy and Gumroad. Which also means most of them look the same.
Consistency is what makes the difference.
With GPT Image 2, you can generate a full set in one go:
“Create 8 cute sticker-style cats working on laptops, pastel colors, consistent design”
From there, you bring them into Kittl and clean them up. Remove the backgrounds, add a simple outline, and space them properly so they don’t feel thrown together.
Now you’ve got something you can package as a sticker sheet or a small bundle and upload directly.
The nice part is how repeatable this is. Change the theme, change the character, run it again — now you’ve got another pack.
Don’t overcomplicate sticker packs. If they read clearly at a small size, they’ll work.
Limitations: What ChatGPT Image 2.0 Still Gets Wrong
Despite its improvements, GPT Image 2 still has some clear limits — especially once you move beyond simple visuals.
It tends to struggle with:
- Dense or repetitive detail (like patterns or crowded scenes)
- Complex physical interactions between objects
- Consistency at very high resolutions
Those issues don’t always show up immediately, but they become obvious the moment you try to use the image in a real project.
More importantly, it lacks the kind of control designers rely on.
You can’t:
- Edit individual layers
- Adjust typography with precision
- Prepare files properly for print
Which leads to a simple conclusion: ChatGPT Image 2.0 is a powerful generator, but it’s not a design environment.
Final Takeaway
GPT Image 2 is one of the most capable image generation tools available today. It produces strong concepts, understands structure, and removes many of the limitations that made earlier tools frustrating to use.
But it doesn’t replace design. It changes where design begins.
Instead of starting from a blank canvas, you start from a generated idea — one that still needs refinement, intention, and control.
The designers who get the most out of tools like GPT Image 2 aren’t the ones generating the most images. They’re the ones who know how to take those outputs and turn them into something cohesive, usable, and worth paying for.
That’s where Kittl comes in.
It gives you a place to take that starting point and actually work with it — refine it, extend it, place it into mockups, and export something you can use or sell. Not just an image, but a finished design that holds up outside the canvas.
If you want to move from generation to real design work, start building your workflow in Kittl.
FAQ
Is GPT Image 2 better than DALL·E 3?
For most design-related use cases, yes. GPT Image 2 is more reliable when it comes to layout, typography, and following structured prompts. It’s less about “nicer images” and more about getting outputs you can actually build on.
Can ChatGPT Image 2.0 generate text in images?
It’s much better than previous models — headlines and basic layouts are often readable. But the text is still part of the image, so you can’t edit it properly. For any real design work, you’ll still want to rebuild the typography in a design tool.
How much does ChatGPT Image 2.0 cost?
Around 15 tokens per image in Standard mode and 30 tokens in HD mode.
What’s the difference between Standard and HD mode?
Standard mode (~15 tokens) is best for exploring ideas and testing directions. HD mode (~30 tokens) is for final outputs once you know what you want. Most efficient workflows use both — not one or the other.
Can I use GPT Image 2 for client work or commercial products?
Yes, but the raw output usually isn’t ready to deliver as-is. Clients and customers expect editable files, consistent branding, and proper formatting. That’s where refining your design in a tool like Kittl becomes necessary.
What is the knowledge cutoff?
December 2025, with additional grounding through Thinking Mode.
Why not just use the AI output directly?
You can, but you’ll run into limitations quickly — especially with scaling, typography, and print. What looks good on screen doesn’t always hold up in real use. Most designers treat AI outputs as a starting point, not the final asset.
What’s the fastest way to turn an AI image into something usable?
Keep the roles separate: generate the concept with GPT Image 2, then refine it in a design environment. In Kittl, you can vectorize elements, rebuild text, apply layouts, and export properly — all without starting over.
Can I use ChatGPT Image 2.0 commercially?
Generally yes, but refining outputs in Kittl ensures professional quality and uniqueness
Do I need design experience to use this workflow?
Not necessarily, but it helps to understand basics like spacing, typography, and composition. The tools make things faster, but the decisions still come from you.

Shafira is a content writer who turns boring business talk into reads people actually enjoy. She grew up hoarding $1 novels in Singapore and writing hilariously bad fiction, but now she tackles content marketing with all that creative chaos since 2019. From blogs and newsletters to UX and SEO, she writes how she thinks: nerdy, honest, and a bit offbeat. She believes the best content is human-designed, not just plain text.